Today I am bringing you a project That uses Paper Cutting, quilling and a wonderful graphic from the Queen of Graphics: The Graphics Fairy. She is so wonderful. If you haven't been to her site.... go as fast as you can! here is the link to the image I am using today. You can search her site for literally thousands of graphics. Free! She's a wonder!
So do you want to make this?
Supplies:
Quilling tool- helpful, but you can use a needle or just your fingers to roll the paper
1/8" strips of pink paper 4 1/2" long. I used 87
hot glue
white glue
glitter
GF graphic (follow link above)
white card stock and printer paper
white cloth covered floral wire- you can use anything to hang this with-ribbon?
a computer and program such as Picnik if you want to "tweak" your graphic
Okay now let's do the Project:
Take your graphic:
manipulate it in a photo editing program like Picnik and adjust the exposure to make it lighter. You can also leave it vintage looking. I wanted mine more stark to go with the wainscoting in my bookcase.
After adjusting the exposure lighter I printed this on white card stock.
I then typed "Valentines" and printed that on card stock and pasted it over the Christmas on the heart. To mask where I had pasted it I added dots of glue and glittered them and other points on the heart as shown:
Next we are going to make our wings. NOW if you feel this is too much for you (it's not hard just a little time consuming) you can look at GF and she has a set of vintage wings here
These would be beautiful as well!
So to make the paper feather like mine here's a picture tutorial
 |
| Picture of finished feathers-see how they are cut on both sides and have the wire? I then hot glue to the back of the heart. No wire shows on front. |
 |
| finished feathers glued in place from front view no wire is seen. Click to enlarge. |
Okay. Now I'm giving shortcuts such as the clip art wings if you don't want to do this as I have done. IF you don't want to quill your edging, you could simply glitter the edge with pink or silver glitter. This would look lovely as well!
If you want to quill, follow these steps:
 |
| Cut 87 pieces of 1/8" pink paper each measuring 4 1/2" long. |
 |
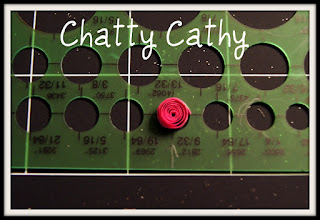
| The size you will roll these strips will be 9/32" You can use a circle guide like I did or draw a circle the size you want and use that as a guide. |
 |
| image of rolled strip on quilling tool. If you do not have one. Simply roll the paper in between your fingers or around a needle. The tool makes this very simple. It can be found here |
 |
| Quilled roll. |
 |
| Roll sized to 9/32" |
 |
| Apply drop of glue to end of paper to secure coil. Pinch end of coil and you'll get a teardrop. |
 |
| Glue teardrop to top of heart as shown. |
 |
| Add a teardrop on either side as show. Now you can continue to work your way around. |
 |
| Continue to work around heart until reaching the bottom, then work other side. |
 |
| Out of cloth covered floral wire make a hanger. I used the tacky glue tip to wrap the wire around to get even circles. Anything goes here, do whatever looks nice to you. |
 |
| Hot glue wire hanger to back of heart. |
 |
| Finished heart |
Sharing with:


Oh wow, this is so impressive. I can't believe you did all of those tiny little pieces by hand. Beautiful. I'm so glad you shared this at our Link It Up Thursday party.
ReplyDeleteThank you so much Terry. It wasn't very hard, but it was enjoyable while watching TV with my hubby. Thanks for visiting and the link party. Drop by again sometime, I'm always adding lots of items.
DeleteWow...that's lovely! I LOVE the saying in the heart! really nice.
ReplyDeleteLorraine
Thank you! I really enjoyed making this item. Isn't Graphics Fairy awesome?
DeleteSooo creative you are!
ReplyDeleteI signed up to follow you on Linky, Mary Alice
Thank you so much Mary Alice! I appreciate your following and visiting the blog!
DeleteWonderful tutorial! Blessings, Debbie
ReplyDeleteThanks so much Debbie and I'm going to hop on over to visit you as well :)
Delete