Pages

Thursday, October 20, 2011

Halloween Porch- On A Budget!

Today I woke in a bit of a funk. I’ve been painting in the house and landscaping which has given me much joy, but I felt restless. Let me explain. I get this restless feeling inside whenever it’s been a little while since I’ve done something creative. Now I know picking paint colors, doing my walls, landscaping and all the projects around the home are “creative” in a way but I mean crafty creative. I had started a paper cone wreath to take to my mom’s porch sale ( see her blog at: http://www.missflibbertigibbet.blogspot.com/ wonderful redone Shabby Chic furniture and French inspired creations!) when she told me on the phone she had made some! Oh well. We had both been crazy over them it was no leap to think we might actually create similar things! Great minds do think alike! When I came home from the porch sale I decided to finish my paper cone wreath for my daughter Kelsey. I took an old praise and worship book of music from the local thrift store. 200 pages of double sided music for 99 cents! I also used an old paper back book for my other wreath (I’ll post pictures next week). Most thrift stores have them under a dollar and I always make sure it’s a book I’m pretty sure will land in a Landfill so I am doing my part at recycling! I would never cut up Little Women for example! My favorite book! I’ll be posting pictures of the wreath for my daughter this weekend. My mom’s blog has a tutorial on it and it’s such an easy project. I made mine slightly different than hers and will also post a “How To” on my weekend post. So making the wreath DID help with my restlessness a bit, but then as I was pulling into the neighborhood I thought: “I know what is bothering me!” My front porch is “nice looking”, 2 chairs, pumpkins, wreath and a faux leaf garland flanking the door. Nice right? It needed more. I fell in love with a Mary Englebreit Home Companion spread on front porches years ago. I drooled over it, but alas I had no front porch or even a stoop! I vowed to one day do a fun porch like that. Now, you will remember that my husband and I purchased a home this summer, and have a daughter in college plus 3 others! Money isn’t exactly something I like to spend right now. My dear husband, David, would give me the moon and the starts if only I asked, but I hate to ask. I think if I have any hidden decorating items I can do the porch up with and sadly come to the realization that living in apartments and townhouses has left me lacking front porch deco! So I kiss him, hand him his coffee and ask what a proposed budget for our front porch decorating would look like? He smiles and says “I’m not used to that.” I said AT&T gives you a budget for projects right? He says “yeah for work, but I’m used to being told ‘I spent this much’” I tell him I don’t do that. You tell me what we can afford and I will stay under that. So we discussed things and he gave me a budget. I came in at just over half of what he told me. Now I could have spent it all and then it would have been spectacular, but restraint and coming in under budget allows him to realize I can be content with less and he can trust me to stick to the budget. Later I may need another budget and I want his trust. So my point is that this project can be done super cheap! Here we go!


The after picture. Night time shots are not my best J
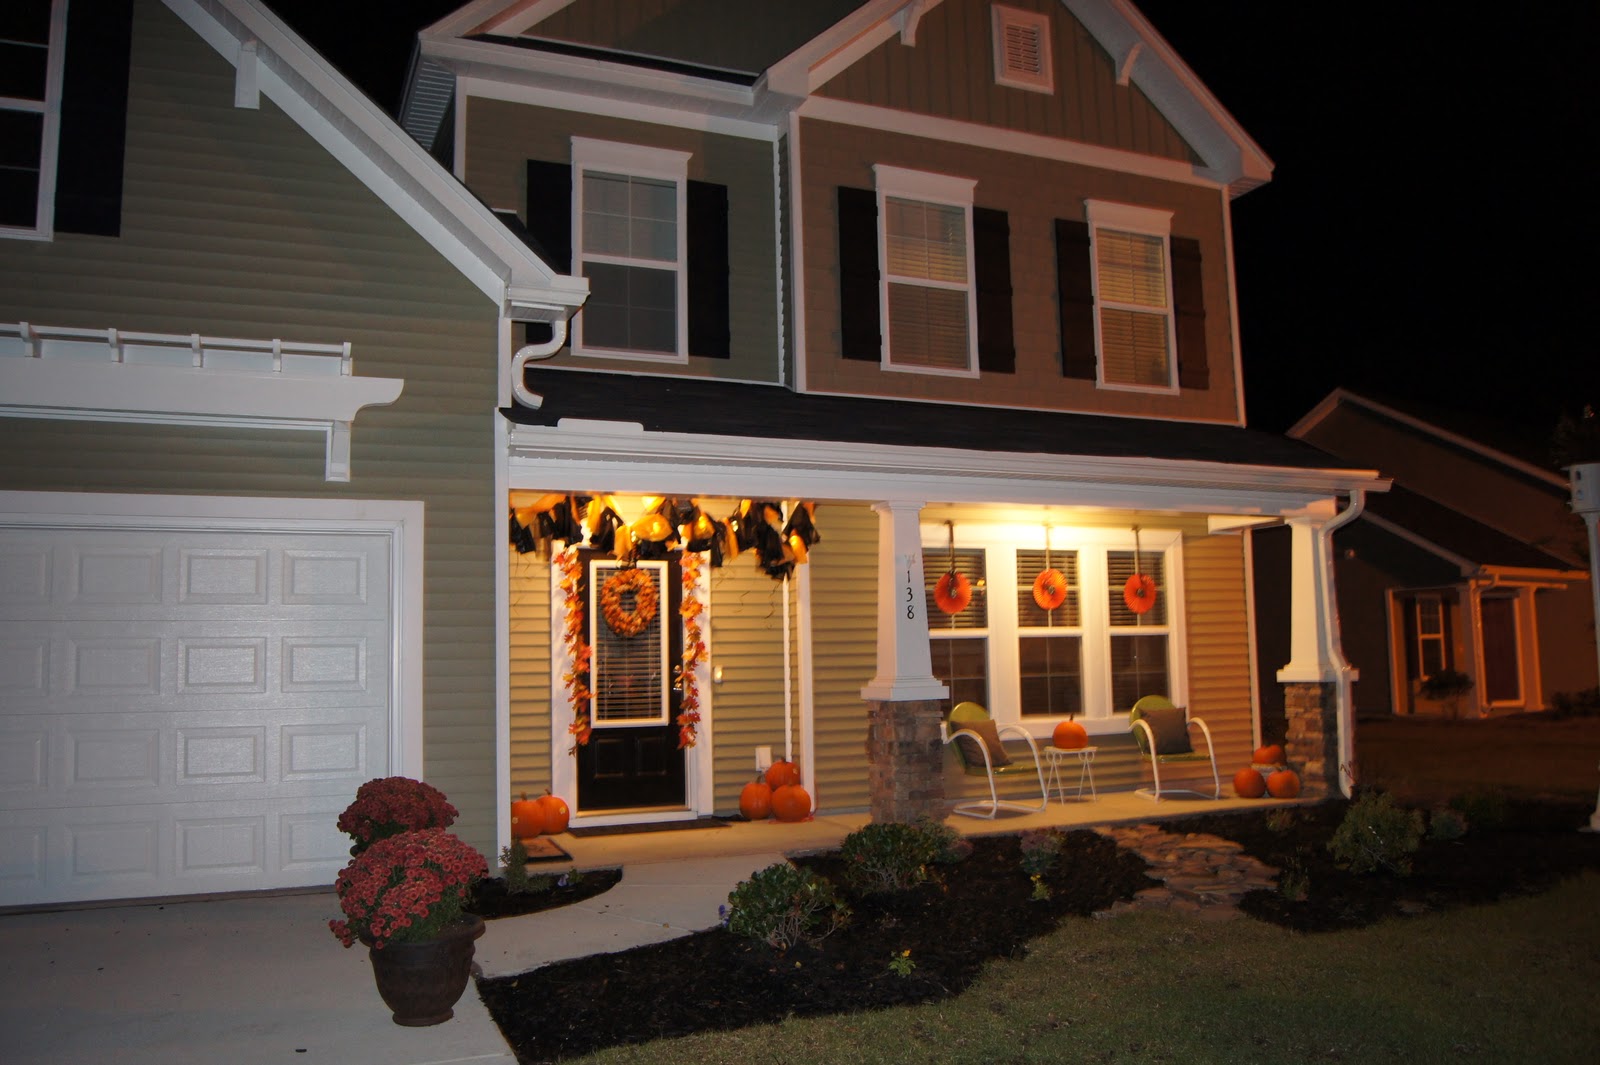
Previously I only had a wreath and those garlands down the sides of the door.

First I ran around and found supplies. Hancock fabrics had a remnant area.

I bought the black and white fabric for $3 a yard. It’s decorator fabric and quite sturdy.
 
The finished pillows! I cut 2 squares per pillow measuring 18 ½ inches square. So a total of 4 squares at 18 ½ inches each. I made a ¾ “ seam all around with a space for inserting the pillow. I would usually sew that up by hand nice and neat, but they are for the front porch and no one will be handling them much, so I sewed the unfinished edge on the machine for this project. It looks great. If you have questions and need detailed info on the pillows please inbox me.

Next I set to work making a garland to hang from the porch roof. I wanted lights in it so I don’t always have to have the porch light on. I knew regular lights would get hot and went for the more pricey LED lights. I purchased them at Wal-Mart for around $7. This was the most expensive part of the project.
They are nice and big!


 Next I had to fill the wire part with Halloween-ish deco. The original picture had black netting. This is impossible to find so close to Halloween. 4 stores showed me that fact. Oh well! I will probably change this to black netting later this year when it’s in stock somewhere! For now I used 2 plastic black tablecloths and 1 orange one from Wal-Mart. Cost: 96 cents a piece. I also bought a spool of black curling ribbon. Cost: $2.


I took the table cloths out of the package and kept them folded length wise. Let me interject at this point: there is no right way to do this. You are just cutting strips. Do what works for you! Here’s a couple photos of me one handed trying to show you while shooting with my other hand! Goodness sake!


Take each section. Open and then fold in half and cut. My goodness my hand looks broken.

Okay now that you have the sections cut, into basically a rectangle, you will tie them onto the cord of lights. You can space these how you want. I did find a stash of 1 yard of netting and tied one here and there. Mine is almost totally plastic tablecloths! I did 2-3 black and one orange. (I could only find one orange at my Wal-Mart). Here’s me tying them on:

It is super windy tonight. I could not get a still shot to save my life! You can kind of see the colors and ribbon and will have to see the distance shot of this to see the effect!


Now I placed curling ribbon ever so often in there. I cut random lengths long enough to hang between the plastic. Maybe 24”?


Now, as I said, I will be replacing it with netting for next year. This is just an example of what can be done for a basement bargain budget! I mean I spent $11 on this whole garland. You cannot beat that.

My next little project was to make paper rounds with the word “BOO” spelled out. Here’s how they turned out!

I will be giving the tutorial on that tomorrow!

Be inspired! Know that even on a shoestring budget, YOU can make wonderful decorations to make your house feel more like a home. Half the joy in seeing the house look so pretty is knowing I am doing it myself!
I hope that all of you have a blessed day and be creative!

Until next time,

Chatty Cathy


2 comments:

  1. The garland looks great! That's the sign of creative people, being able to change-up in a pinch if the first idea doesn't work!

    ReplyDelete
  2. Thank you www.missflibbertigibbet.blogspot.com I appreciate the feedback.

    ReplyDelete