Only 12 days till Christmas!
My Chihuahua Apollo is at the ready. He thinks we are doing something fun like making cookies. He loves to glean the floor and get his sugar fix! Bad news for Apollo but good news for you is we are making Christmas cards. These are already sent out but I decided to include this tutorial. You could use the ornament as a gift tag instead of the front to a card. They turned out very simple and elegant! Hope you enjoy!
I choose a verse and printed it out in the shape of my teardrop. I have a Mac and can choose to place text in a shape. I think you can do this in most programs. If you cannot or don't know how you can just type your verse so it will fit in a shape when you go to cut it out by centering and then typing each line to create the shape like this:
Merry
Merry Christmas
A Very Merry Christmas
A Very Merry Christmas
A Very Merry Christmas
Merry Christmas
Merry
See the ball shape? I love that mine already went into the shape for me! Good luck because I am no computer tech person and that's all the help I can give you on that part! :)
Start with card-stock in colors you like. This year I went with pale green pearl and light berry colors. I used Martha Stewart glitter. Her glitter is superfine and I can't rave enough about it. I used scrap booking photo mounts to create the little cap on the ornament. I used a paper cutter to trim my pieces of card-stock and scissors to trim the card-stock under the ornament. Tacky glue and that's about it for supplies. Pretty cheap and much more personal than store bought cards. OH! You'll also need twine or string for the hanging of the ornament. This brings me to a funny story. I had Depression Era Great Grandparents. I am thrifty by nature and blood. I hold onto supplies carefully, using only what I need to use. At Thanksgiving, while visiting my parents in Virginia Beach, I went to a restaurant supply place with my father. I saw red and white butcher twine and immediately said "I'm getting that". It's finer than what you find in craft stores, but I like it. These spools had thousands of yards on them. I am never going to use this much! My dad right away didn't want my mom left out and bought her one as well. Then my sister had to have one as well! So we have something like 50,000 yards of twine. You'll see in this tutorial how I have only cut pieces about 1/2" too long to trim. I mean, what am I saving this for? I had to chuckle because no matter what the family is frugal! So on with card making!
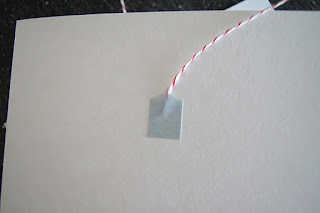
Use a photo mount to secure piece of twine to card about where you want the top of the ornament to go.
Use Tacky glue or white glue to secure the twine straight up to give a taught "hung look" to the ornament.
Peel top off photo mount and sprinkle with silver glitter and tap off excess.
Trim excess twine from top of card.
Apply a thin edge of glue to side of ornament.
Dredge in glitter and tap off excess.
Finished glitter edge.
I took the printed verse in the ornament shape and cut them out. I then mounted them on my card-stock and trimmed the card-stock leaving an edge as a frame. Glue to card just under the "cap" of glitter.
From scraps of card-stock hole punch or cut circles of red for berries. Also freehand some Holly Leaves and draw veins for leaves with pencil.
Apply leaves and berries to top of card.
The finished cards ready for mailing!
I have made smaller versions of the ornaments to attach to the cookies we'll deliver to our neighbors this weekend.
I hope you enjoy the tutorial and have a wonderful day!
Until Next Time!
Chatty Cathy


